What to expect in your first 21 days
You've unboxed your QROOT, filled the reservoir, and dropped in your first seeds. Now what? Here's a day-by-day guide to what happens next - and when (if ever) you need to do something about it.
Days 1-3: Germination begins
Your seeds are absorbing water from the grow sponge. You won't see anything happening on the surface, but inside each seed the embryo is swelling and preparing to crack open. The dome caps are critical during this stage - they trap humidity around the seed and prevent the sponge from drying out.
What to do: Nothing. Resist the urge to peek under the domes. The pump is cycling water and the LED timer is running automatically. Let the system do its work.
Days 4-7: Sprouts emerge
Tiny white or green shoots push through the sponge surface. This is the most exciting moment - proof that your indoor garden is working. Different herbs sprout at different speeds: basil and rocket show up first (day 4-5), while parsley and coriander take longer (day 7-10).
What to do: Once a sprout is visible and about 1 cm tall, remove its dome cap. The cap served its purpose (humidity for germination) and leaving it on now would restrict growth. Leave domes on pods that haven't sprouted yet.
Days 8-14: True leaves develop
The first set of leaves you see are cotyledons - seed leaves that were packed inside the seed. They're usually round and simple. The next set of leaves are the true leaves - they'll look like the actual herb. Basil true leaves are pointed and fragrant, mint leaves are textured and serrated.
Stems are thickening, roots are extending down into the water, and the plants are now feeding actively from the nutrient solution. You might notice the water level dropping slightly - that's normal and good.
What to do: Check the water level indicator. If it's getting low, top up with fresh water and add a small dose of nutrients. This usually isn't needed until week 3, but fast-growing setups with warm ambient temperatures can drink faster.
Days 15-20: Growth accelerates
This is where hydroponic growing really shows its advantage over soil. The plants have established root systems and are now growing visibly day to day. Basil will be several inches tall with multiple leaf pairs. Lettuce will be forming rosettes. The aroma of herbs like mint and basil becomes noticeable when you walk past.
What to do: If any plant is significantly taller than the others and blocking the LED light, pinch the top growth. This encourages the plant to branch sideways rather than growing straight up, and gives shorter neighbours more light access.
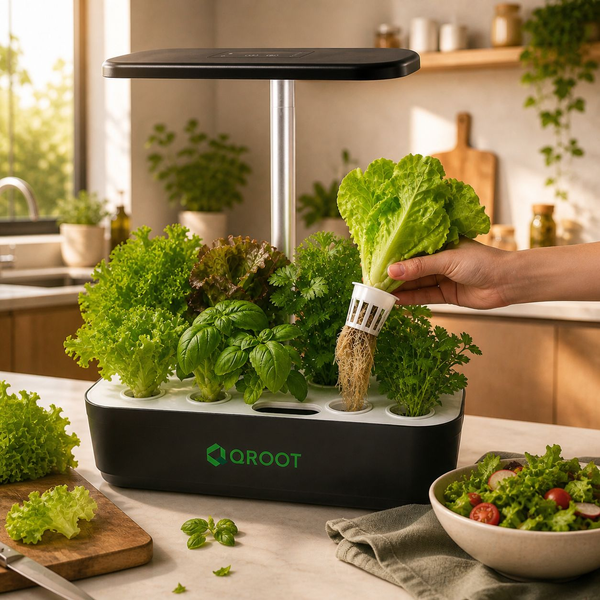
Day 21+: First harvest
Most herbs and leafy greens are ready to harvest when the leaves are 10-15 cm tall. The key rule: snip, don't pull. Use scissors or your fingers to cut stems above a leaf node (the point where two leaves meet the stem). The plant will branch from that node and keep growing.
A single planting gives you 3-5 harvests over 2-3 months before the plant exhausts itself or bolts (goes to seed). When that happens, pull the old plant, rinse the pod, and start fresh with a new seed.
Common first-timer questions
- My seeds haven't sprouted by day 7. Some varieties take up to 14 days. Check that the sponge is moist and the dome is on. If nothing appears by day 14, the seeds may be old - try fresh ones.
- The stems are thin and leaning. They're stretching for light. Make sure the LED panel is close to the plants (10-15 cm above the tallest one). On the Plus model, lower the lamp arm.
- I see roots hanging in the water. That's exactly what should happen. Healthy hydroponic roots are white and spread through the water and nutrient solution.
- There's condensation inside the dome. Normal during germination. Once sprouts are visible, remove the dome to prevent mould.